Get-User -RecipientTypeDetails UserMailbox | where {$_.UseraccountControl -like “*accountdisabled*”} | Export-Csv C:\disabledwmail.csv
Dienstag, 8. August 2017
Get Mailboxes which are associated with disabled AD Accounts
Mittwoch, 26. Juli 2017
Configure Resource Mailbox Options (equipment or room mailbox) in OWA - user documentation
This guide explains how a delegate accesses a resource mailbox (room or equipment) calendar and responds to meeting requests in Outlook Web App (OWA). Furthermore it is possible to change settings of the resource mailbox by using OWA. It is not possible to configure advanced settings of the room mailbox using Outlook.
Prerequisite
Open the resource mailbox
Prerequisite
- A hosted Exchange 2013 or 2016 account.
- You are a delegate for the resource mailbox or you have full acccess to the resource mailbox you want to access.
Open the resource mailbox
- In your Outlook Web App session, click on your name, and then on Open another mailbox.

- In the search box, type the name of the resource for which you are a delegate.

Note: you can click on Search contacts and directory to directly pick the room name from a list based on your research criteria. - Once you’ve selected the resource mailbox or when its name has been verified, click on Open.

Note: You may have to select the language and time zone for the resource mailbox. Proceed, then click save. - The resource mailbox opens in a new tab, click on Calendar, and select the period of time to display (Day, Work week, Week, Month). All invitations received by the resource mailbox are displayed.

- Inside the resource calendar, locate the desired invitation. You can either click, right-click or double-click on it for more actions.
Note that the meeting request will appear with the subject changed to the organizer’s name.
- Opening the meeting request, you will see an informative message indicating the status of the invitation (Accepted, Declined or Tentative) with the name of the delegate who responded (if not the resource itself).

- Click the gear icon and then options to configure the resource mailbox settings

- The following options are available in the Calendar settings


- Resource Scheduling Options: These options control the behavior of meeting requests that are sent to the resource mailbox.
- Resource Scheduling Permissions: These options control how meeting requests become room reservations.
- Resource Response Message: This setting lets you add customized text to notification messages that are sent to users who try to reserve the resource. The text you specify is added to notification messages for acceptances and declines.
Once you’re done with managing the meeting requests, simply click on the resource name, then on Sign out.
Dienstag, 25. Juli 2017
Exchange: Getting Mailbox Sizes in PowerShell in MB - sort by size
You can use the following powershell command to filter the mailboxes sizes by Custom Attribut (department / country):
Just all mailboxes, sort by size, display in MB:
Just all mailboxes, sort by size, display in MB:
Get-mailbox -resultsize unlimited| Get-MailboxStatistics | sort-object TotalItemsize | FT DisplayName, @{label="Mailbox size (MB)"; expression={$_.TotalItemSize.Value.ToMB()}}All mailboxes with export, sort by size, display in MB:
Get-mailbox -resultsize unlimited| Get-MailboxStatistics | sort-object TotalItemsize | FT DisplayName, @{label="Mailbox size (MB)"; expression={$_.TotalItemSize.Value.ToMB()}} | export-csv c:\test.csvFilter by customattribute 10 with export, sort by size, display in MB
Get-mailbox | where {$_.CustomAttribute10 -eq "employee"} | Get-MailboxStatistics | sort-object TotalItemsize | FT DisplayName, @{label="Mailbox size (MB)"; expression={$_.TotalItemSize.Value.ToMB()}} | export-csv c:\test.csv
IPhone and Exchange: Wrong date, time or time zone on your iPhone - User documentation
After the time zone change in turkey we had some users complaining about the wrong time zone on their Apple IPhone. See Microsoft Blog.
Wrong date, time or time zone on your iPhone
If you see the wrong date, time, or time zone, or can't automatically switch to daylight savings time on your iOS device, learn what to do.
Check your settings of your mailbox, your Outlook and your iOS device
1. Change the time zone and language to the correct setting in Outlook Web App. To do this, follow these steps.
- Sign in to Outlook Web App (https://yourinteralexchangedomain/owa/), click Settings, and then click Options.
- In the left navigation pane, click Settings, and then click Regional.
- In the Current time zone box, click the arrow, and then click the correct time zone setting.
- Click Save.

2. Open your Outlook client and check the settings.
3. Verify your windows computer settings, also take a look at the daylight saving settings:
To Change Time Zone in Settings Windows:
To Change Time Zone in Settings Windows:
- Click on the Clock in lower right corner of your taskbar and click on Date and Time Settings.

Date & TimeThe settings here are quite simple here as the main overview has it all. You can set the time to adjust automatically or change it manually. Do not forget to select your Time Zone according to the country you live in.
Although it is turned Off in the above image, you may want to turn on Adjust for Daylight Saving Time automatically. In most of Europe, local time is moved forward by 1 hour in Spring and moved backward by 1 hour in Autumn. This happens around March or April and ends in October or November. This practice is called Daylight Saving Time.
Turn off Set Time Automatically and you will be able to change the time and date manually, via the following setting box which opens, as soon as you set it to ‘Off’. However, setting it to set time automatically is always recommended.
- Plug your device into power and connect to the Internet with Wi-Fi.
- Tap Settings > General > Software Update.

- Tap Download and Install. If a message asks to temporarily remove apps because iOS needs more space
for the update, tap Continue or Cancel. Later, iOS will reinstall apps that it removed. If you tap Cancel, learn what to do next . - To update now, tap Install.
- If asked, enter your passcode.
5. Verify your iphone settings (https://support.apple.com/en-us/HT203483):
If you see the wrong date, time, or time zone, or can't automatically switch to daylight savings time onyour iOS device, learn what to do.
Automatically. For example, you might have iOS 9 or earlier and your country or region or government changes the time zone or the observance of Daylight Saving Time (DST). If so, follow these steps:
If you see the wrong date, time, or time zone, or can't automatically switch to daylight savings time on
- Turn on Set Automatically in Settings > General > Date & Time. This automatically sets your date and time
based on your time zone . - Check that your device shows the correct time zone in Settings > General > Date & Time > Time Zone.
- Go to Settings > General > Date & Time.
- Turn off Set Automatically.
- Now you can change the time zone or the date and time
- Tap Time Zone and enter a city with the time zone that you need. (Not sure which city to enter? Use the
time-zone map on timeanddate.com to find a city with a time zone that matches your needs.) - Or tap the date to change the date and time.
- The option to turn on Set Automatically might not be available with all carriers or in all countries and
regions. - If the time on your iOS device is wrong after you sync it with your computer, your computer's time might
be wrong. Check the time on your computer in System Preferences > Date & Time. You might want to select "Set date and time automatically."
Blackberry BB UEM (BES) v12.6 Server does not start after Java Update
Unfortunately the latest Java SE Runtime Environment killed the BES UEM Application Server. To fix this I had to replace the latest Java Version with one that is compatible with BES12 UEM 12.6. After that you need to re-run the setup. Otherwise BES UEM tries to access the old Java installation.
- Make sure you download the correct (compatible Java Version) for your BES (12) UEM, check the compatibility Matrix from Blackberry, see http://help.blackberry.com/de/blackberry-uem-compatibility-matrix/current/
- Obtain the 64-bit version of the Java Runtime Environment software from the Oracle Oracle Java SE 8 Archive Downloads (in my case Java SE Runtime Environment 8u121 - Windows x64 Offline)
- Start the installer and let the installer remove the old versions
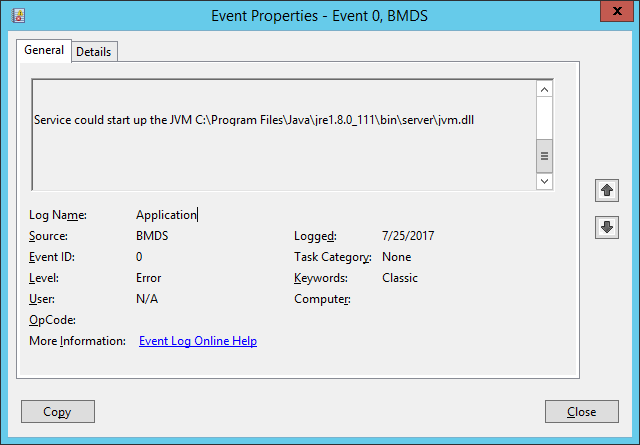
- Now the Application Event Log will show you something like this when you try to start the BES services:

- Unfortunately you need to re-run the BES12 installer for the current version on the machine(s) where the JRE was updated. Start the installer with the BES12 administrative account from the extracted setup files, for example:
C:\BlackBerry\UEM\BlackBerry UEM 12.6.3\Setup.exe (Make sure you select the current installed version (take a look at Control Panel\All Control Panel Items\Programs and Features) - Reboot the server, the BES Server should be running again now.
- Optional: Disable Java Updates to prevent another downtime... :)
Create a CMD file and run it with the following to change the registry settings:
reg add "HKEY_LOCAL_MACHINE\Software\JavaSoft\Java Update\Policy" /v EnableJavaUpdate /t REG_DWORD /d 0 /f /reg:32
reg add "HKEY_LOCAL_MACHINE\Software\JavaSoft\Java Update\Policy" /v EnableAutoUpdateCheck /t REG_DWORD /d 0 /f /reg:32
reg add "HKEY_LOCAL_MACHINE\Software\JavaSoft\Java Update\Policy" /v NotifyDownload /t REG_DWORD /d 0 /f /reg:32
reg add "HKEY_LOCAL_MACHINE\Software\JavaSoft\Java Update\Policy" /v NotifyInstall /t REG_DWORD /d 0 /f /reg:32
reg add "HKEY_LOCAL_MACHINE\Software\JavaSoft\Java Update\Policy" /v EnableJavaUpdate /t REG_DWORD /d 0 /f /reg:64
reg add "HKEY_LOCAL_MACHINE\Software\JavaSoft\Java Update\Policy" /v EnableAutoUpdateCheck /t REG_DWORD /d 0 /f /reg:64
reg add "HKEY_LOCAL_MACHINE\Software\JavaSoft\Java Update\Policy" /v NotifyDownload /t REG_DWORD /d 0 /f /reg:64
reg add "HKEY_LOCAL_MACHINE\Software\JavaSoft\Java Update\Policy" /v NotifyInstall /t REG_DWORD /d 0 /f /reg:64
Montag, 24. Juli 2017
Outlook closes on minimize
Some users started complaining that Outlook closes as soon as they minimize it. New to them
Hide when minimized
When Outlook is running, you’ll also see an Outlook icon in the Notification Area. Click on it to bring up a menu and to toggle the option “Hide When Minimized”.
If you don’t see the Outlook icon in the Notification Area after starting Outlook, the icon might be set to hide. Press the expand (upward “<” character) button at the left side of the Notification Area to expand it and show all hidden icons as well.
- Outlook has the option to minimize to the Notification Area (in the bottom right corner next to your time).
Hide when minimized
When Outlook is running, you’ll also see an Outlook icon in the Notification Area. Click on it to bring up a menu and to toggle the option “Hide When Minimized”.
If you don’t see the Outlook icon in the Notification Area after starting Outlook, the icon might be set to hide. Press the expand (upward “<” character) button at the left side of the Notification Area to expand it and show all hidden icons as well.
 |
| Disable “Hide When Minimized” for Outlook in 3 clicks. |
How to Find Folder Paths in Outlook Mailboxes
We receive a lot of questions asking how to search for folders or get folder paths in Outlook.
If you don't need to locate the folder a message is stored in very often, you can use Advanced Find to see
Using Advanced Find to Show the Folder PathTo find the folder a message is stored in when using Outlook, use Instant Search to find a message that is stored in folder then use Advanced Find (Ctrl-Shift-F) to see where the folder is.
 |
| Only the name of the top folder is visible in the details of an opened Email. |
If you don't need to locate the folder a message is stored in very often, you can use Advanced Find to see
Using Advanced Find to Show the Folder PathTo find the folder a message is stored in when using Outlook, use Instant Search to find a message that is stored in folder then use Advanced Find (Ctrl-Shift-F) to see where the folder is.
- Run an Instant Search (or Advanced Find) to find an e-mail in the "target" folder. Don't forget to select All Mail items (Current Mailbox or All Mailboxes in Outlook 2013/2016) or All Subfolders from the Search toolbar.
- Open (double-click) a message you know is in the folder.
- Press Ctrl-Shift-F to open Advanced Find.
- Click the Browse button to reveal the full path to the e-mail.
 |
| With Ctrl-Shift-F - Browse you can see the full path to the email |
Calendar Repair Assistant - Delete re-created calendar items - Exchange 2013/2016
Behind the scenes, the Exchange E-Mail Server runs a tool called Calendar Repair Assistant (CRA), which
Users may not notice the Calendar Repair Assistant (CRA) at all, or may see one of the following:
The most common reason the Calendar Repair Assistant needs to "fix" your calendar is that you deleted a meeting
Source: https://it.cornell.edu/facstaff-email/calendar-repair-assistant
Users may not notice the Calendar Repair Assistant (CRA) at all, or may see one of the following:
- A meeting you deleted from your calendar reappears.
- You see the message "Your meeting was found to be out of date and has been automatically updated."
- You see this text appended to the bottom of the meeting notes:
Exchange re-created a meeting that was missing from your calendar. The meeting was re-created because the meetingorganizer previously received an Accepted or Tentative response from you. To make sure the calendar item is up to date and the organizer has your latest status, please accept or decline the meeting from within your calendar.
 |
| It may look like this (Screenshot of Outlook 2016 with Exchange 2016): |
- To delete returning calendar items please use Outlook Webmail and delete the entry.
Source: https://it.cornell.edu/facstaff-email/calendar-repair-assistant
Dienstag, 18. Juli 2017
Surface Hub Account Creation

1. Create or enable the mailbox:
Create:
New-Mailbox -UserPrincipalName HUB01@contoso.com -Alias HUB01 -Name "Hub-01" -Room -EnableRoomMailboxAccount $true -RoomMailboxPassword (ConvertTo-SecureString -String <password> -AsPlainText -Force)
If the AD account exists enable the mailbox:
Enable-Mailbox -Identity HUB01USER
2. Apply Policy:
However, policies can only be applied to user accounts and not resource mailboxes. You need to convert the mailbox into a user type, apply the policy, and then convert it back into a mailbox—you may need to re-enable it and set the password again too.
Set-Mailbox "HUB01" -Type Regular
Set-CASMailbox "HUB01" -ActiveSyncMailboxPolicy $easPolicy
Set-Mailbox "HUB01" -Type Room
3. Various Exchange properties can be set on the device account to improve the meeting experience for people. You can see which properties need to be set in the Exchange properties section.
Set-CalendarProcessing -Identity "HUB01USER" -AutomateProcessing AutoAccept -AddOrganizerToSubject $false –AllowConflicts $false –DeleteComments $false -DeleteSubject $false -RemovePrivateProperty $false
OPTIONAL (TOOLTIP NOTIFICATION IN OUTLOOK):
Set-CalendarProcessing -Identity "HUB01USER" -AddAdditionalResponse $true -AdditionalResponse "This is a Surface Hub room!"
4. Set-AdUser "HUB01" -Enabled $true
5. Enable Lync:
Enable-CsMeetingRoom -SipAddress "sip:HUB01@contoso.com" -RegistrarPool contoso.com-Identity "HUB01"
6. Add Surface Hub Conferencing Policy:
Grant-CsConferencingPolicy -identity sip:dHUB01@contoso.com -PolicyName SFHUB
source:
https://technet.microsoft.com/en-us/itpro/surface-hub/on-premises-deployment-surface-hub-device-accounts
more information (german):
http://www.msxfaq.de/lync/konferenz/surface_hub_einrichtung.htm
http://www.msxfaq.de/lync/konferenz/surfacehub.htm
Upload custom Exchange Unified Messaging (UM) voice mailbox

It is possible to upload a custom voice mailbox sound file per user with skype for business 2015 and Microsoft Exchange 2016:
Here a little how to:
- Convert your audio file to the following format using http://audio.online-convert.com/convert-to-wav
Audio bitrate: 16 kbps
Audio frequency: 8000 Hz
Audio channels: mono
Normalize audio: yes

- Use an exchange user with impersonation rights (See Exchange application impersonation )
- You need the EWS API installed to use the script.
- Put your wav audio file to C:\Scripts\Skype\Track\
- Use the following script from Ben Lye to upload your wav file and enter the user name and path to the wav file:
- After the upload you should get a summary, make sure that you can see the correct "SampleRateHz",
otherwise you did not convert the audio track correctly.

Exchange 2016 and the iPhone Meeting Request Bug
We're seeing many complaints that Outlook automatically sends meeting updates to the attendees several times a day. When users delete the responses from their inbox it triggers another update to attendees.
It appears to be a problem only for people who sync iPhones with Exchange 2016.
This issue is caused when iPhone users accept / edit or even view meetings on either their iPhones or iPads with the native iOS Exchange Active Sync.
Symptom
Invitees are receiving constant calendar meeting updates for a meeting created by me even though no changes have been made.
The updates are being sent every 5-10 min
Workaround
Until Microsoft or Apple releases a fix, use this solution:
Delete existing appointments and create a new one. Regard the following steps to avoid the same issue again.
Other workaround which may work: Disable the “Time to Leave” feature via the “Settings > Calendar > Default Alert times” > Disable Time to Leave (Source: https://blogs.technet.microsoft.com/ericwhitehill/2017/05/10/smart-forward-on-ios-devices-or-why-am-i-seeing-so-many-calendar-invites/ )
General recommendations:
When you receive a meeting invite wait a few minutes before accepting or processing it. Allow time for all your devices (phone, desktop, home) to get the message synced to them.
Do NOT accept/respond to meeting invites and updates from your mobile phone or device. Wait until you are at your desktop (Outlook) to respond from there.
For a person doing the scheduling: do not create meetings on mobile devices (personal appointments are ok just don't invite others). Use a desktop client or web client to schedule meetings. When an occurrence of a recurring meeting needs to be moved or updated, it is best to cancel the occurrence and create a new one time meeting on the correct date. Also, don't schedule recurring meetings for longer than 6 months. Start a new series instead.
Source:
- https://blogs.technet.microsoft.com/ericwhitehill/2017/05/10/smart-forward-on-ios-devices-or-why-am-i-seeing-so-many-calendar-invites/
- https://support.microsoft.com/en-us/help/3108249/attendees-receive-a-meeting-update-after-the-event-reminder-is-triggered
- https://www.slipstick.com/outlook/calendar/iphone-and-the-meeting-request-bug/- https://kb.intermedia.net/article/1875- https://its.uiowa.edu/support/article/104422- https://support.microsoft.com/en-us/help/2563324/current-issues-with-microsoft-exchange-activesync-and-third-party-devices- https://kb.intermedia.net/Article/1875
Troubleshooting Miracast connection to the Surface Hub

Troubleshooting Miracast connection to the Surface Hub
The Surface Hub supports wireless projection through the Miracast protocol. Most wireless monitors and adapters available today use the original implementation of Miracast.Connect issues
Press Windows logo key + K on your keyboard, and select the Surface Hub you want to project to. Try the following if it does not work:
Start with the basics and ensure both WI-FI and Miracast are both enabled in settings on the Surface Hub. If you ran a network scan, you should see the Hub Miracast listed as an access point. If the Hub’s Miracast network shows up on the scan, but you cannot not see it as an available device, you can try to adjust the Miracast channel used by the Hub. When the Hub is connected to a WI-FI network it will use the same channel settings as the WI-FI access point for its Miracast access point. For troubleshooting purposes, disconnect the Hub from any WI-FI networks (but keep WI-FI enabled), so you can control the channel used for Miracast. You can manually select the Miracast channel in settings. You will need to restart the Hub after each change. Generally speaking, you will want to use channels that do not show heavy utilization from the network scan.
Profile issues
If you are not able to connect to the Surface Hub remove the old profile from setting. You can remove the Miracast devices in settings - devices. After that try to connect press Windows logo key + K on your keyboard, and select the Surface Hub you want to project to.
BABALA
Abonnieren
Posts (Atom)